Thursday, March 5, 2015

Misato pictures!

I'm finally getting to writing something about Desucon, yay go me it's only been like 3 weeks. In my defence I have had a lot to do in school (and should totally be studying for an exam now, but hey, let's get to posting those Misato pics instead. Yeah, that's the smart thing to do) but here you go, some pictures of my finsished Misato cosplay :D Most of these pics were taken on Sunday since Saturday was sort of busy, and because of the freezing cold it wasn't much fun to go outside for a shoot, so most of them are indoor pictures. We did take some outside too but I was too stiff from the cold to pose properly so they looked kinda meh. Terefor many of these are taken in Sibeliustalos mysterious indoor lighting, but anyway, my Misato cosplay from Desucon;


I like this one a lot, it shows off the worbla badge nicely, plus I managed to smile in a photo, yay me!


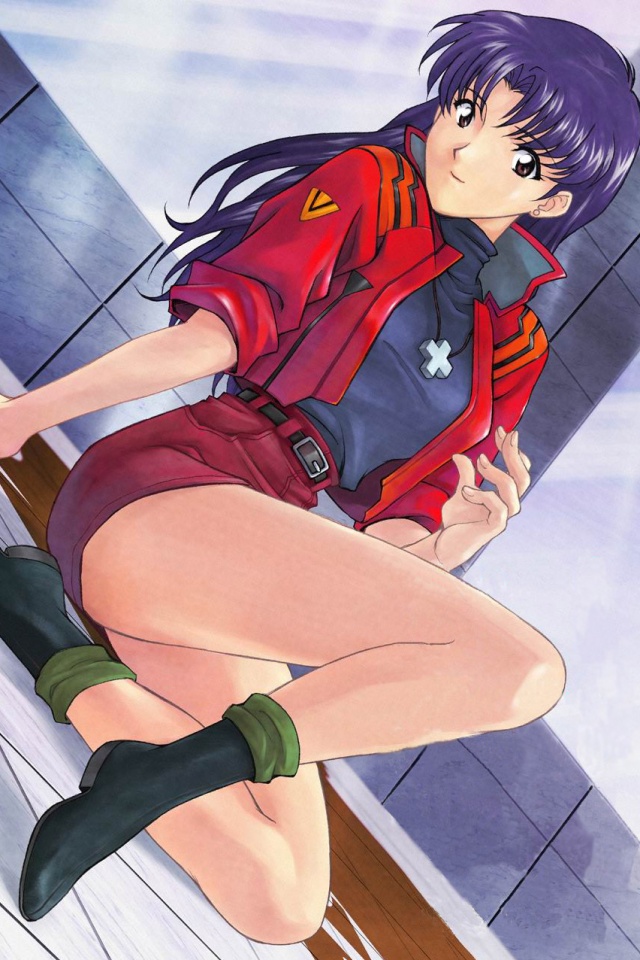
The last one shows the zipper detail on the sleeve really well. I won't be writing much more in this post, I'll try my best to get a con report together within a reasonable time frame, plus maybe some pose that touches the topic of Misatos wig. But that's for later, see you then!

/Amanda

Thursday, February 5, 2015

Frostbite incoming!

Only one week left until Frostbite! Hopefully everybody is finishing up their costumes nicely and won't have to stress the last few days before the con weekend. My cosplay plans for Frostbite are pretty straightforward, I'll be cosplaying Misato from Evangelion both Saturday and Sunday, unless I have a change of heart and decide to bring something else for Sunday. I feel pretty tired of most of my simple school uniform cosplays though, and I don't want to bring anything elaborate for Sunday, so most likely I'll just rock Misato both days. I'll get there pretty late on Friday, so Friday is a no cosplay day.
      I'm still not 100% done with Misato, but most of the pieces are starting to take shape. I made the dress in a couple of hours, and a pair of green socks to wear with the boots. I still have some buttons to attach, and some details on the jacket to make. Then there is the wig, I'll have to style that sometime next week as well. But I don't think I'll have to have any sleepless nights before the con, so I got that going for me, which is nice.


 Some pictures of my progress with the dress and the socks. I really need to clean my shoes haha. I'm liking what I've done with this costume so far, and I'm really excited to debut it next week! I wish you all luck with your costumes! 
     Also, another reminder of mine and Hanskus discussion circle on Saturday! I'm looking forward to hosting a program and it'll be totally fun, you should all come :DD *shameless advertising*


So, are you going to Frostbite, and what are your cosplay plans? :) I might be back with a wig post sometime next week, otherwise I'll be back after Frostbite with a traditional post-con post~ See you next time!

/Amanda

Monday, January 19, 2015

I have a jacket! And a wig!

I'm back! What is this, I have written more blog posts in the past week than I did during the second half of 2014! Anyway, before I get to cosplay stuff I want to do some shameless advertising and tell everyone I made a twitter (AnmandaCosplay)! I mainly made one to follow the con twitter accounts, but I have posted some stuff on there as well, so if you're feeling it you should go check it out. I'm always looking for other awesome cosplayers to follow on there as well :3 I'll try to get a link in the "Other sites you can find me at" box on the right as well. But now, back to the important stuff.
     I managed to finish the sewing portion of my Misato jacket during the weekend. There are still some details to be added, like the badges on her sleeves for example, but nothing major. I made the jacket first because she wears it all the time, but she does change outfit quite many times during the anime. I'm actually choosing between two different outfits of hers, so I'll put up some pictures of the two at the end of this post, and I'd love to hear your opinions on which one looks better :3
     Anyway, I'm eager to show you the jecket in all its glory, so here you go, my almost finished Misato Katsuragi jacket;


Aaaaaaand it's not even fully finished in the first picture I decide to show haha. Too bad. I did finish up the sleeves though, you'll find a picture further down~ Anyway, I'm really just trying to showcase the lining here. It was all hand sewn into place since I knew no better way of attaching it haha., but I think it looks really neat (especially after I ironed it. Which was after this pic was taken. Of course. My planning skills get an 11/10)


I of course had to try it out in the middle of the night yesterday when I realized that I had a long, black top in my closet. One of Misatos outfits consists of this jacket and a tight black dress, with black shoes, similar a pair I already own. When I realized I had a top that could pass for a tight black dress I just had to try it on. I'm sorry for all these bad mirror shots, I don't have anyone I can ask to take my picture since I live alone ._.
I wish the collar would have shown better, my stupid hair hides it....


And I found another picture that makes the previous one quite useless. Oh well, in this one I've tried everything on again, however, as you might see, I got my wig in the mail today, yaay. A review is going to appear some time soon, but I won't focus on the wig in this post, it still needs heaps of styling and cutting. 
In this picture the collar is quite visible, and I really like how it turned out. Making it was a pain, since I had to make my own bias tape from scratch since I wanted a perfect match with the red color of the jacket, so I didn't even bother checking out the selection of bias tape in the store. BUT, I did come up with some cool tricks for making the painful process of making bias tape just a teeny tiny bit less painful;


So, in this picture I have already folded it the first time, which is the most tideous part of the process, but I used the exact same technique for that. I'll explain what's going on in this picture in a little more detail. First I started out with a 4 cm wide fabric strip that I cut on the bias of the fabric well yeah, it's called bias tape for a reason. I then folded it in half and ironed it just slightly so I'd get a crease in the middle of the strip. Then the oh so painful process of folding over the edges to achieve the look in the picture started, but this is where I managed to save myself some frustration using a heavy book (great use for your school litterature btw). I folded the edges and pressed them with a hot iron, and then as soon as I lifted the iron I placed the pressed, hot part under a book. This way the fabric cools down under the pressure of the book, and you get nice flat bias tape instead of having the edges you so carefully folded and pressed stand right up like this ->  \__/  This is really useful when working with heavier fabrics that don't want to stay put no matter what. Eventually the bias tape will start sticking out on the other end, and you have yourself a nice little bias tape pressing machine, just pull the end sticking out and the parts you just pressed will slide in under the book. 
Or you could just buy a bias tape maker. If you don't know what it is, look it up. It will amaze you. I would have ordered one if I wasn't so eager to work on this costume. I didn't want to wait weeks for it to arrive.

     Now that I got that off my chest, back to jacket pictures;


Here are the infamous sleeves, zipped and unzipped. She never wears her sleeves zipped, but I thought it'd be a cool addition to the costume to have zippable sleeves. They did put zippers there in the design after all.

Oh, and I made her necklace pendant too, that wasn't a very interesting process, I made it out of some grey clay, and here is the result:


Yes, very interesting indeed. It is not perfect and I might remake it since I have more clay, but I'll see how I feel about it later.


I'll finish with an oh so not sexy selfie. However, this picture also gices you some visuals of the collar, even if it is a bit crooked since well, selfie stance. I did a quick Misato makeup test as well since I got the wig and all. I'm definately going for less sharp eyebrows the next time. I have never cosplayed a character that is supposed to look much older than myself before, so this is unknown territory. Misato is 29, that's a 10 year difference... I've only cosplayed teens (or otherwise really young looking characters) before, but I'll try to look up some tips and tricks on how to look older. Then again, Misato is pretty youthful after all, so maybe it won't be that hard to get a good makeup look going. This is not quite it though.


And finally (yeah I said I'd finish but I wasn't really done. Psyche.), the two options I have for her outfit. I'd love to hear your opinions on which one to make, I really am having trouble deciding. 


A black dress with some white details, pretty straightforward, or


this version, with a skirt and a black polo shirt.


The second pic is not an official one, but you get the general idea. The one with the dress is probably a bit more common, but she does wear both outfits in the anime multiple times~
     Now I promise I'll quit writing. This have been a very text heavy post, but hopefully you enjoyed the progress pictures and my awesome bias tape making tip. As I said, a wig review is going to be posted in a few days, see you then~


/Amanda

Saturday, January 17, 2015

Misato progress

I've been working hard on Misato the last week, and I've gotten pretty far on her jacket. It is a really fun project, since there is so much more to it that I thought at first. I'm glad I didn't decide to make this costume any earlier in my cosplay career, even though it's been on my cosplay list for quite a while. I'll get to the pictures then~


The entire process began with my machine refusing to do a zigzag stitch. After much frustration and some sewing machine cleaning, I managed to resolve the issue. I feel like these first wobbly zigzag stitches I managed to do are worth sharing, a lot of work and not so pretty language lies within these bad boys.
I then proceeded onto adding some details to the back piece of the jacket. Nothing special, but it's a detail easy to miss since it's in the back.

The shoulders of the jacket are decorated as well. I made the decorations using an orange fabric and some bias tape. I despise working with bias tape.... However these turned out ok. I did redo one of them after this image was taken, since they aren't exactly the same.

Just a quick view on how the sleeves are supposed to look like. I haven't yet finished the sleeves, but hopefully they will look something like this when they are done.


I the attached all of the pieces, and worked a bit on the lining as well. I remade the applique on the front of the jacket after this picture was taken, since it looked hideous. Oh and I also made an inner pocket, that you can't see here since it's on the inside. But I sort of fell in love with pockets after making Sinon, so I just had to put one somewhere on this cosplay as well~


Here you can see the remade applique. Looks a lot better, with sharper looking triangles. I also added the zipper at this point, which is kind of hard to see since my phone is really blocking it. I also started adding the facing for the inside. The red strip hanging out of the jacket is the facing that I haven't attached yet. (I'm not sure if it's called facing if it goes all the way around the hem of the jacket though?)
The jacket is really starting to come together here, after just one week of work.


Yay, MORE mirror selfies. In this picture I have attached the facing all around the jacket. All the edges are really neat looking for now. Adding the facing was thefinately one of the most nerv wrecking parts so far. It was one of thos steps that is supposed to make everything look prettier. If it had turned out bad, I wouldn't have known what the heck to do. Luckily it turned out ok.


Yay, neat edges ftw! Yes little fold left of the zipper. I see you. You're not gonna exist for much longer >:( This is how the jacket looks like closed. Or well, how the bottom part looks like closed haha.

And finally, a shot showcasing the inside and the facing. All that is left is to add the collar and the lining, which probably is going to take forever, but I like pretending that I am almost done. 
     Anyway, that is it for this post. Hopefully I'll finish this jacket somewhat soon, and you'll all get to see how it turned out. I have a wig on its way as well, and it reached Finland yesterday (Friday) so I'll most likely get it some time next week. I'm thinking about doing a review again like I did with my Sinon wig, so maybe you'll get some of that as well. Take care~


/Amanda

Wednesday, January 7, 2015

Preparing a new costume and Desucon Frostbite plans

One of the most important factors in making a succesful cosplay is, at least to me, really getting to know the outfit you're going to make. To really think through where you want to put your seams, when to attach the details, to make sure everything works together and hopefully to avoid some time consuming fails along the way of making it. I usually start out by sketching out the difficult pieces of a costume while studying reference pictures, to make sure I have grasped the entire design of the costume. It is easy to forget about small details when working on an entire cosplay, but by really paying attention to the design, piece by piece, nothing is likely to slip by unnoticed. And then there is of course animation syndrome that makes everything look entirely different from scene to scene in an anime, but that's a different story...
     I'm currently doing exactly this kind of research on my upcoming project, which I'll debut at Desucon Frostbite in February, the character being Misato Katsuragi from Neon Genesis Evangelion. 

I've wanted to cosplay from NGE for quite some time, and now it is time. At first I thought Misato would be an easy cosplay to make, her outfit looks fairly simple, but DEAR GOD there is so many details all over it. Plus the general construction of the jacket is sort of wonky. But I'm starting to figure things out now, luckily. Hopefully this won't turn into a nightmare project haha.


This is what I usually do to get friendly with a design, I attempt to redraw it and notice all the details.

I gathered some materials already;


Hopefully I'll get working on this costume soon enough, but as of now this is how far I've gotten. I'll keep you updated on the process, and hopefully I'll have an awesome costume for Frostbite! Until next time, take care~


/Amanda

Friday, January 2, 2015

Cubone!

As I mentioned in my earlier post, I made a Cubone gijinka for Desucon this summer, and since I haven't gotten around to posting pictures of it yet, I figured I would post some now, more than half a year later haha. The dress is really simple, the main piece of this costume is undoubtedly the dinosaur head, which is at least supposed to resemble a Cubone skull. All in all this was a very quick and rushed project, but I do actually have some progress pictures of it as well, so I'll throw those in at the end of this post for those of you who are interested :3


The dress was really simple


I frayed the edges of it using scissors
The head:


I made a rough base for the head using camping mat and some chicken wire

I put a layer of paper mache on the base, and then covered the entire thing in expanding foam. Then I spent some hours carving it into the right shape, and then I added paper mache on top, some gesso and finally paint.
The bone club was made in pretty much the same way as the head, using expanding foam and paper mache to strengthen it.
     All in all, this is definately not one of my favorite cosplays, but I guess it's kind of cute. It was however fun to make and wear a gijinka costume, so that will for sure happen again *hint hint* Anyway, I'll finish this post with a picture of Cubone, just in case some of you don't know how this little Pokémon looks like;


/Amanda

Wednesday, December 3, 2014

Activity and such

Ahem, I've not been a good blogger for a while (again) have I? Well, I figured I should update you all (if people are still even reading this blog haha) on what's been going on in my life, both cosplay wise and in my personal life. Actually, cosplay wise noting much has happened. I made a rushed Cubone (Pokémon) gijinka for Desucon in summer, but after that nothing much has happened. I would post some pictures of that cosplay if it weren't for the fact that they are on a external hard-drive about 400 km away now. Which sort of brings me onto what has happened in my personal life. 
     I moved away from Vaasa to Turku this fall to attend university (another reason not much cosplay have been happening), so yeah, there's that. BUT, I do have cosplay plans for the future, and the next con I'll be attending is Desucon Frostbite in February. Hansku and I are hosting a discussion circle on Saturday at 12:30, so everyone is super welcome to join us for that!
     Yeah, that pretty much sums up my short where-I've-been post, hopefully I'll have some more actual content for you sometime soon(ish) when I get back to working on costumes. Goodbye for now~


And some orphan baby bats. Completely relevant. And cute.


/Amanda